My own little space to share my artistic journeys and fulfill my ambition to inspire...

Thursday, 23 January 2014

Flower Girl Illustration...

Hey everyone! So recently I've been looking at a lot of fashion illustration as it is (in my opinion) a really beautiful form of art. I've been inspired to have a go myself so I've got back into practicing faces.
Also, it seems that I have a slight obsession with flowers at the moment too. All of the clothes that I've purchased recently have been covered floral print. I guess I'm just subconsciously wishing for spring to arrive...


Anyway, bearing all that in mind, I stuck a flower headband on my sister and took some photos for a spot of illustration. These have been edited using Picasa. I based my final illustration on the photo on the right.
 Then I started sketching...
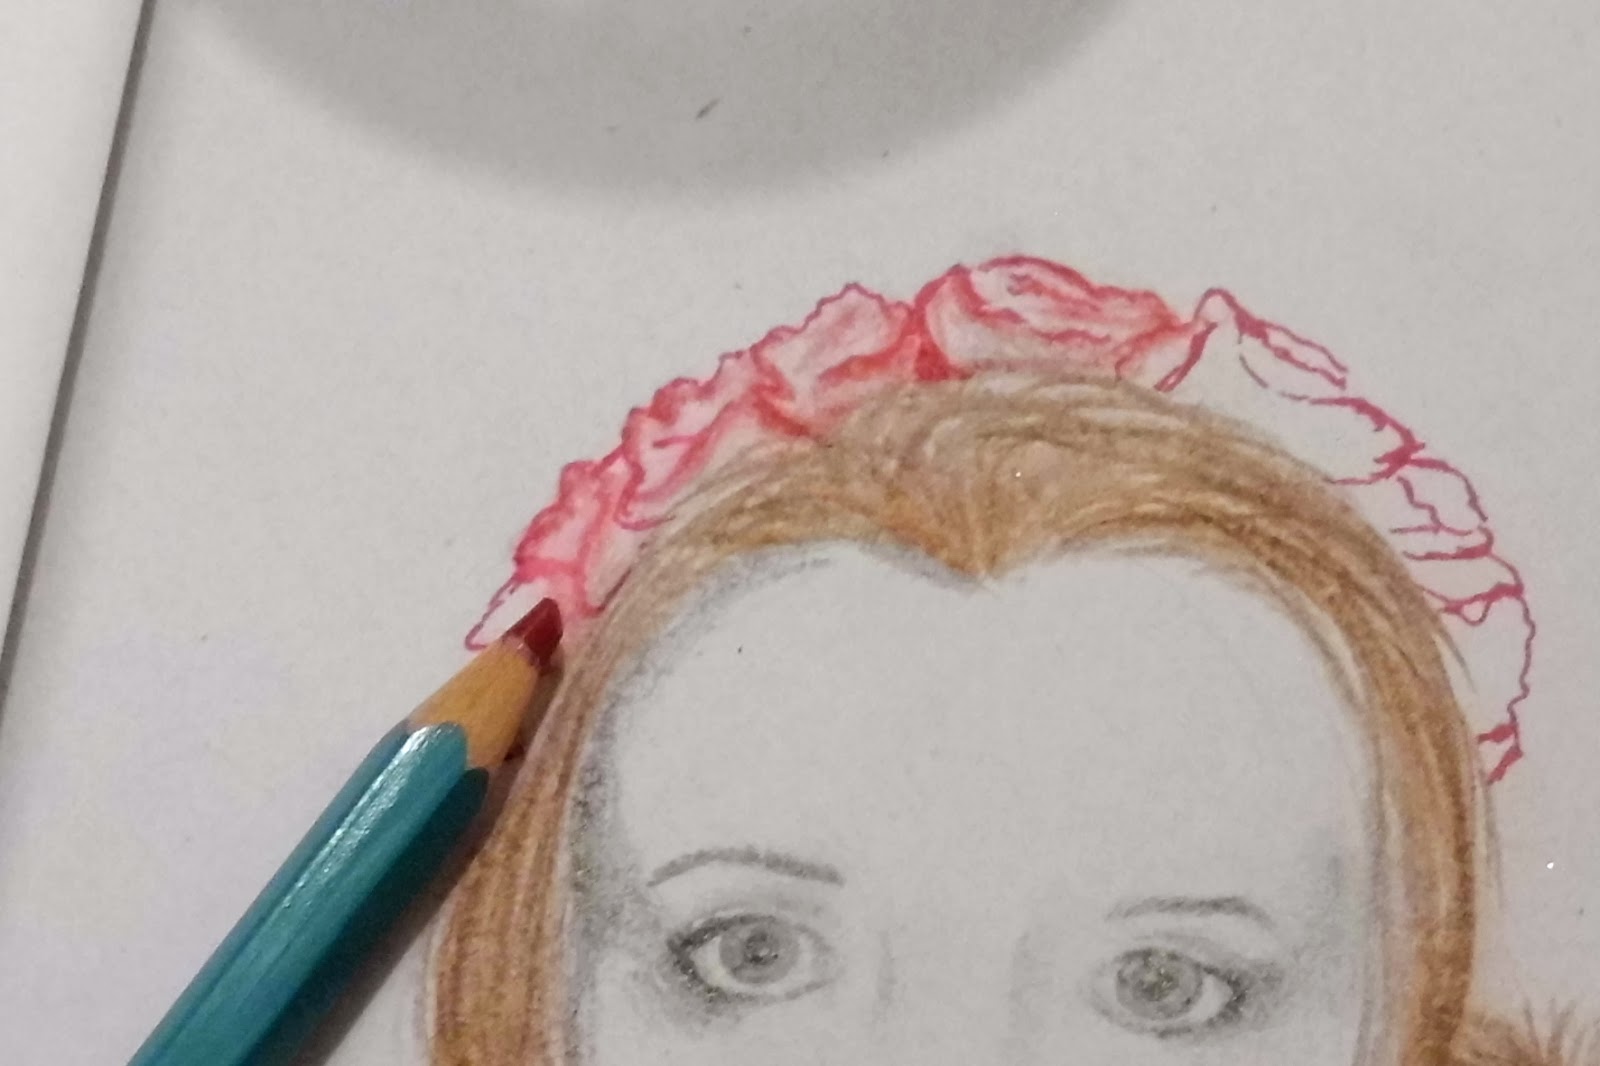
I wanted to experiment with a few different materials in this piece: drawing pencil, coloured pencil, watercolour and fine liner pen. The flower head band didn't turn out as I wanted initially so I came up with a different plan...

I took these photos a couple of summers ago in my Grandma's garden. my cunning plan was to print a few off and do a bit of collage-ing.

 Generally my rule in any sketchbook or on any piece of work is: If you do something you don't like, there will be a way to cover it up. Just a little bit of creativity and imagination can save any piece of artwork.

Here's the finished piece! I'm very pleased with the way it turned out. I love how the different materials add contrast and the flower collage really stands out. A big thanks goes to my lovely little sister. 
Until next time...
Emma x


Sunday, 19 January 2014

Woodland Walk Inspiration...

Hi everyone! So here the weather hasn't been great (typical of north England). This morning however I decided to brave the cold and the rain and dragged my wonderful little sister out for an early morning walk. I'm so lucky to live just round the corner from a little bit of countryside and woodland; it's so nice just to escape sometimes.
Apologies for the raindrops on the camera lens but as you can see it was very wet this morning. I love how the country always seems so green and vibrant, even on this grey rainy day. My pink spotty umbrella is from IKEA by the way.
I love this shot of the woodland path.


As you can imagine, drawing standing up and getting a photograph all while keeping dry was no easy feat, so all credit goes to my lovely little sister for this shot. Even though she complained all the way home that her hands were freezing off, she did a decent job :)


I did a very quick sketch of a tree branch while in the woods. I know that it's not the most interesting subject in the world, plus the paper got a bit soggy, so I redrew and worked on it when I got home.


I thought my sketch could use a bit of colour so I drew some dark green leaves on using a fineliner that I got in a pack of 12 from WHSmith.


I then used some oil pastels to add more colour and a bit of texture. They're a really great tool!

So here's the finished product! I love how the oil pastels create a wispy, willowy kind of feel to it. The great thing is that this sketch only took me about 10 minutes from start to finish. Not bad for a morning walk in the woods.
Until next time...
Emma x

Sunday, 12 January 2014

Step by Step Sketchbook Page

Since most of the posts I've done so far have been mainly snippits of my sketchbooks I felt like I should shake things up a bit. I wanted to show you how I create my sketchbook pages (this one is from 'Emma's Little Book of Quotes' which I featured in my last post). So here goes...
Ta-daaa! Here is the finished page. This only took me about 20 minutes to do.

 For the background I decided to use watercolour pencils. They're such great tools as they're so quick and easy to use and they take much less clearing up than paint.
The general rule with watercolour pencils is 'the more the merrier' as you get a really intense colour. Another great feature is that you can blend colours in the same way as normal watercolour paints.


As you may have seen in my previous posts, I use a lot of cutouts from magazines in my art. For this page I chose a photograph of a model from the waist upwards and decided to add on a crazy skirt made from patterned paper. The idea of using these cutouts is to expand on top of them.
  Once the collage was stuck onto the page, I shaded around the
edges with a drawing pencil and then a black biro pen to make it
stand out.


Here it is! The page completed with the quote. I hope you enjoyed this post and that it has shown you just how quick and easy it is to create a sketchbook page.

Until next time...
Emma x


Tuesday, 7 January 2014

Emma's Little Book of Quotes

Hi everyone! Hope you had a great Christmas and a happy New Year. Anyway, I know it's been quite a while since my last post so I thought I'd show you another little sketchbook of mine. This one I like to call 'Emma's book of inspirational quotes' and does, quite simply, what it says on the tin. I use this little book to experiment with backgrounds and try out different techniques.

Firstly I have to mention this adorable personalized stamp that my friend designed for a birthday present one year. I love it and I stamp it on every sketchbook I own so you might see it crop up a few times.


 Brown paper bags are great for crumpling up and creating textured backgrounds. Also it gives a bit of bulk to the sketchbook and let me tell you, there is nothing more satisfying that a full, chunky book!


So as you see I've used a lot of cut out body parts - not in a sadistic way ;) - from magazines to paint around and over them. This technique gives a centre of focus to the page.


So there you have it. A flip through another of my books that I'm sure will continue to grow over the year. One of my New Year's resolutions is to put posts up more often so fingers crossed I stick to it...
Emma x 

Saturday, 21 December 2013

Seasons Greetings...

I thought I should post something Christmas themed as I'm feeling very festive at the moment. With all the Carol services and wrapping and decorating I've been doing I felt like it was high time I made a Christmassy post.
This year I made Christmas cards for some of my closest friends and somehow I managed to make all three of these cards within two hours.

The Christmas tree, Gingerbread man and Snowman are shapes cut out of wood which I painted with acrylic paint. This step took the longest; all I had to do after that was mount them on cards and write a little message underneath in gold gel pen. When it comes to cards, I find the simplest designs are often the most effective so despite the temptation to add more, I had to stop myself.

Usually I write extra little messages in my Christmas cards as opposed to just having 'Merry Christmas' so this year I wrote each of my friends a little poem inside which made them laugh. 

I was very pleased with the way these cards turned out and I thoroughly enjoyed making them. It was well worth the time I spent on them and I'll definitely be making some next year. 
Have a FANTASTIC Christmas everyone!

Emma x 


Tuesday, 10 December 2013

An 'Altered' Magazine...

If you're anything like me, you won't be able to part with some of your favourite issues of your favourite magazine without making full use of them first. This is why I decided to have a go at turning one of my old magazines into a piece of artwork. I got this idea from a friend who owns a craft shop/studio where I've been going to paint and learn ever since I was six years old!


My chosen magazine to 'alter' was the June 2012 issue of Company Magazine. I love the design and layout of this magazine anyway, so I didn't want to completely mask it in artwork.

Instead I used the best features and images in the magazine as a base, and built up layers of paint or collage around them.


An essential tool for painting on magazine pages is Gesso. A thin layer instantly turns a glossy magazine page into a papery, almost chalky surface. Also an under layer of Gesso allows you to wipe off any paint that goes on top easily. As you can see in this picture, it gives the look of bits of faded text peeking through the paint...a rather cool effect.


Of course I couldn't paint over some of my favourite articles. That's the beauty of altering a magazine, you can pick and choose which bits you use and don't use; you're effectively improving something you'd enjoy looking at anyway.


Another way to use your old magazines to the full, is to cut out any body parts (I know that sounds a bit sadistic) and use them in your altered pages as I've done here with the eyes. I'm planning to go into this technique in more detail in a future post.

Anyway, I thoroughly enjoyed altering this magazine and let me tell you, its much cheaper and quicker than buying a new sketchbook! Enjoy the pics...


Emma x

Sunday, 8 December 2013

A peep at my Sketchbook...


I was really struggling to decide what to write about for
 my first post, so after much consideration, I thought I'd
give you a brief look at one of my old sketchbooks just to give you an idea of my style.

I created this over about five months for my Btec Art course at school. I chose Btec over GCSE as it offered more free reign with the project  briefs and taught me to be independent with the design process. Although some people may like a bit more structure, I felt it worked well for me and this decision payed off (my mark was a Distinction Star in the end).


Even though this is a Btec Art sketchbook, I hope it will also help those of you doing GCSE as the examiners will be looking for simillar features. Also it's much more interesting for the examiners to look at a bright and well presented book as well as it being much more fun to create...a win win situation.


I'm planning to go into more depth with this sketchbook in future posts, about things like the background techniques, clever ways of annotating and nifty tricks to fit all of your artwork into your book.

For now though, just have a little nosy through these photos. Enjoy!
Emma x