My own little space to share my artistic journeys and fulfill my ambition to inspire...

Wednesday, 8 June 2016

Pimp your Sketchbook: A Tale of Two Projects

While I was doing my Btec Art course at school, I would desperately trawl the internet looking for sketchbook ideas and inspiration. Unfortunately I couldn't find much, and what I did find was lacking in detail and helpful tips. That is why I'm creating this post: to help and inspire anyone doing GCSE, A level or another Art qualification at school.

People often forget that the sketchbook is just as important as the final piece. Examiners are interested in the creative and artistic process, that is to say, what research you did, how you used this in developing your ideas throughout the project and what techniques you have learned. The best sketchbooks are full of mini works of art in their own right- I've sometimes been more proud of the work that I've created in my sketchbooks over my final piece.

Here are a couple of different projects from my final year at school...in detail of course.

PROJECT 1: HUMAN FORM-PRINTING PROJECT
Due to the distinctive nature and aesthetic of printing techniques, I decided to create a sketchbook to match by using block colours, clean lines, and often uniform text.
My first calling point with any project is research. I usually Google or Pinterest search the overarching themes of the project, focusing on particular artists or styles that catch my eye.


I've written around the images information such as the artist's background and inspiration, what techniques/materials they use, the main ideas of their pieces etc. As long as you show some analysis and opinions on your artist research the examiner will be happy.

For this printing project, we had to try and present many different types of printing techniques creatively in order to pass.


Ripped up pieces of black card in the background add form and interest to an otherwise plain page. Here, both my initial research and finished print are presented side by side: a simple yet effective layout.

We also had to include our printing tools into the book so I cut a page to fit my lino cutting and stuck it on, creating it's own little flap.

Every time you have a new focus or idea, write it down in whatever form works, to show the examiner how the project is developing. Remember, the sketchbook should present your creative process. Towards the end of the project I sketched the basis for my final piece, mainly as practice before carving the image into lino. Many people don't like those unpolished practice pages in a sketchbook but you can bet that your art teacher will beg you to keep them: they will get you marks, I promise!


PROJECT 2: GROWTH AND DECAY-PAINTING PROJECT
Sometimes, I start my projects with an initial ideas page, using research (often secondary sources) to tie in all of the overarching concepts involved in the project. Growth and Decay was such a broad and complex topic that I needed some way to gather and narrow down any possible ideas: cue mood board creation...
 You can see how this sketchbook required a more organic, nature related aesthetic in comparison to the first project. Paint also allows more freedom with colour and texture, something that I tried to get across on this page.
I made a list of every aspect of Growth and Decay I could think of, and put them all together, praying that an interesting line of focus would jump out at me.
Examiners go crazy for artist studies so here is a study of Jason deCaires Taylor's underwater statues in watercolour pencils.

Another thing that examiners love, is use of primary sources, and these are easier to get than you may think. If you see something around you that could link to your project in whatever obvious or obscure way, take a picture of it, sketch it, film it and get the evidence in your sketchbook. These are photographs that I took myself, lovingly explained and embellished with that hidden gem of collage materials: an old magazine.

I presented the focus of my project which was 'Growth and Decay in the city' with a two page mixed media collage (a reoccurring favourite of mine).

My favourite part of the sketchbook by far are the next few images. I needed a clear yet fun way of presenting Growth and Decay in Paris. Using primary sources, secondary sources my own sketching and painting, I created a section that resembled a cross between a lift the flap children's book and an architecture enthusiast's travel journal.


I thought this montage looked so effective, it was the major inspiration for my final piece. It is usually the case that ideas for final pieces pop up unexpectedly while playing around in your sketchbook. Even though sticking research onto a page or trying out a particular material or technique might seem pointless, it could just lead you to your final goal.

So there we go! Thank you for reading my most epic blog post to date. I hope that it has given those of you in the icy grip of exam season some inspiration and helpful tips.  

Saturday, 28 May 2016

A (re)Introduction & Edinburgh things

Hello everyone!
I realise that it has been a ridiculously long time since my last post and I can only apologise as this past year has been extremely busy. Here is a short re-introduction into Confessions of an Artaholic and a glimpse at some of the places and things that have been inspiring me recently.

In September I upped sticks and moved to the wonderful city of Edinburgh to study at university. Not only the fact that I've been studying History of Art there, but the city itself has inspired me and expanded my art knowledge beyond recognition. And no surprise: it’s bloody gorgeous!

This is a painting that I fell in love with on Rose Street on one of my first trips to Edinburgh.

I was particularly inspired by the majestic beauty of Edinburgh’s Calton Hill (one of the best places to see sunset in the city) to create this canvas for my boyfriend on Valentine’s day. For the background I collaged Robert Burns poems, using the magic, must-have ingredient of gesso on top to create a chalky surface to paint on. Then I washed this with watercolour and painted the foreground details on top with acrylics. Layering with different materials is my favourite way of creating landscapes.


Moving to a city rich in history and culture has had a profound effect on the way I think about art and the everyday details that could be turned into art. Studying the History of Art has enhanced my analytical and observational skills and offered an insight into why an artist may create or present something in a certain way. Over the coming months I hope not only to share my artwork, but my analysis and opinions of issues in the art world along with exhibition reviews. Think of this as a rebirth, (a renaissance if you will) of this here art blog.

Having a deeper understanding and appreciation of art can enhance your creativity massively, and that is what I’m hoping to share with you. Thank you for joining me on this new leg of my artistic journey!

Emma

Sunday, 20 July 2014

London Scrapbook (part 1)...

Hi everyone. Sorry again for not posting in a while. I thought I'd share with you a fun little project I'm working on. Last October I went on my very first trip to London -this might surprise you, but I am from the very North of England and it's about an 8 hour drive. Anyway, I had a fab time, did lots of touristy things, went to see a show and generally took lots of pictures.

Strangely enough, it wasn't until May that I had the idea to make a scrapbook about my London adventure. I dug out this scrapbook that I had been given as a birthday present a couple of years ago as I thought it was more than ideal.
This particular book is from Paperchase and it has gorgeous, sturdy black card pages. It couldn't be any more perfect for a London scrapbook!
In my opinion silver gel pen looks FANTASTIC on black card ,and a page of text can look really effective.
Of course I had to include a little sketch with coloured pencils, just for fun. I think it adds a bit of cuteness.

 I tried to get a mixture of photographs and tickets, receipts, maps etc. on each page to add interest and make it look arty and fun. The most important part of making a scrapbook is the way you arrange the objects...
 

My advice is to get creative with things like plane tickets and maps and arrange them so that they can fold out like a pop up book. It'll make the scrapbook so much more fun to look through. 

Also I would advise you to arrange and rearrange your items on the page first before sticking them down. That way you can shuffle things round and get a more arty, quirky look.

 It's great to get a mixture of textures too, like the shiny photograph next to the plain paper soldiers. Collageing and overlapping always looks great!


 Writing round the edges of photographs looks great too!

I felt that my Wicked ticket was too special to stick into the book with glue, so I made a nifty little pocket by folding a page over and gluing the edges down. 

So there you go! a quick tour of my London Scrapbook so far. I'll be putting part 2 up soon, but I hope this has encouraged you to catologue your travels and adventures this summer in an arty and interesting way. I think it looks pretty great when everything is put together on the page. And just think how much you'll love looking back on these in a few years time. In my opinion scrap-booking is so much more interesting than just putting your photos in a photo album. Thanks again everyone!!!
Until next time...
Emma x 

Tuesday, 3 June 2014

Watercolour Orchids...

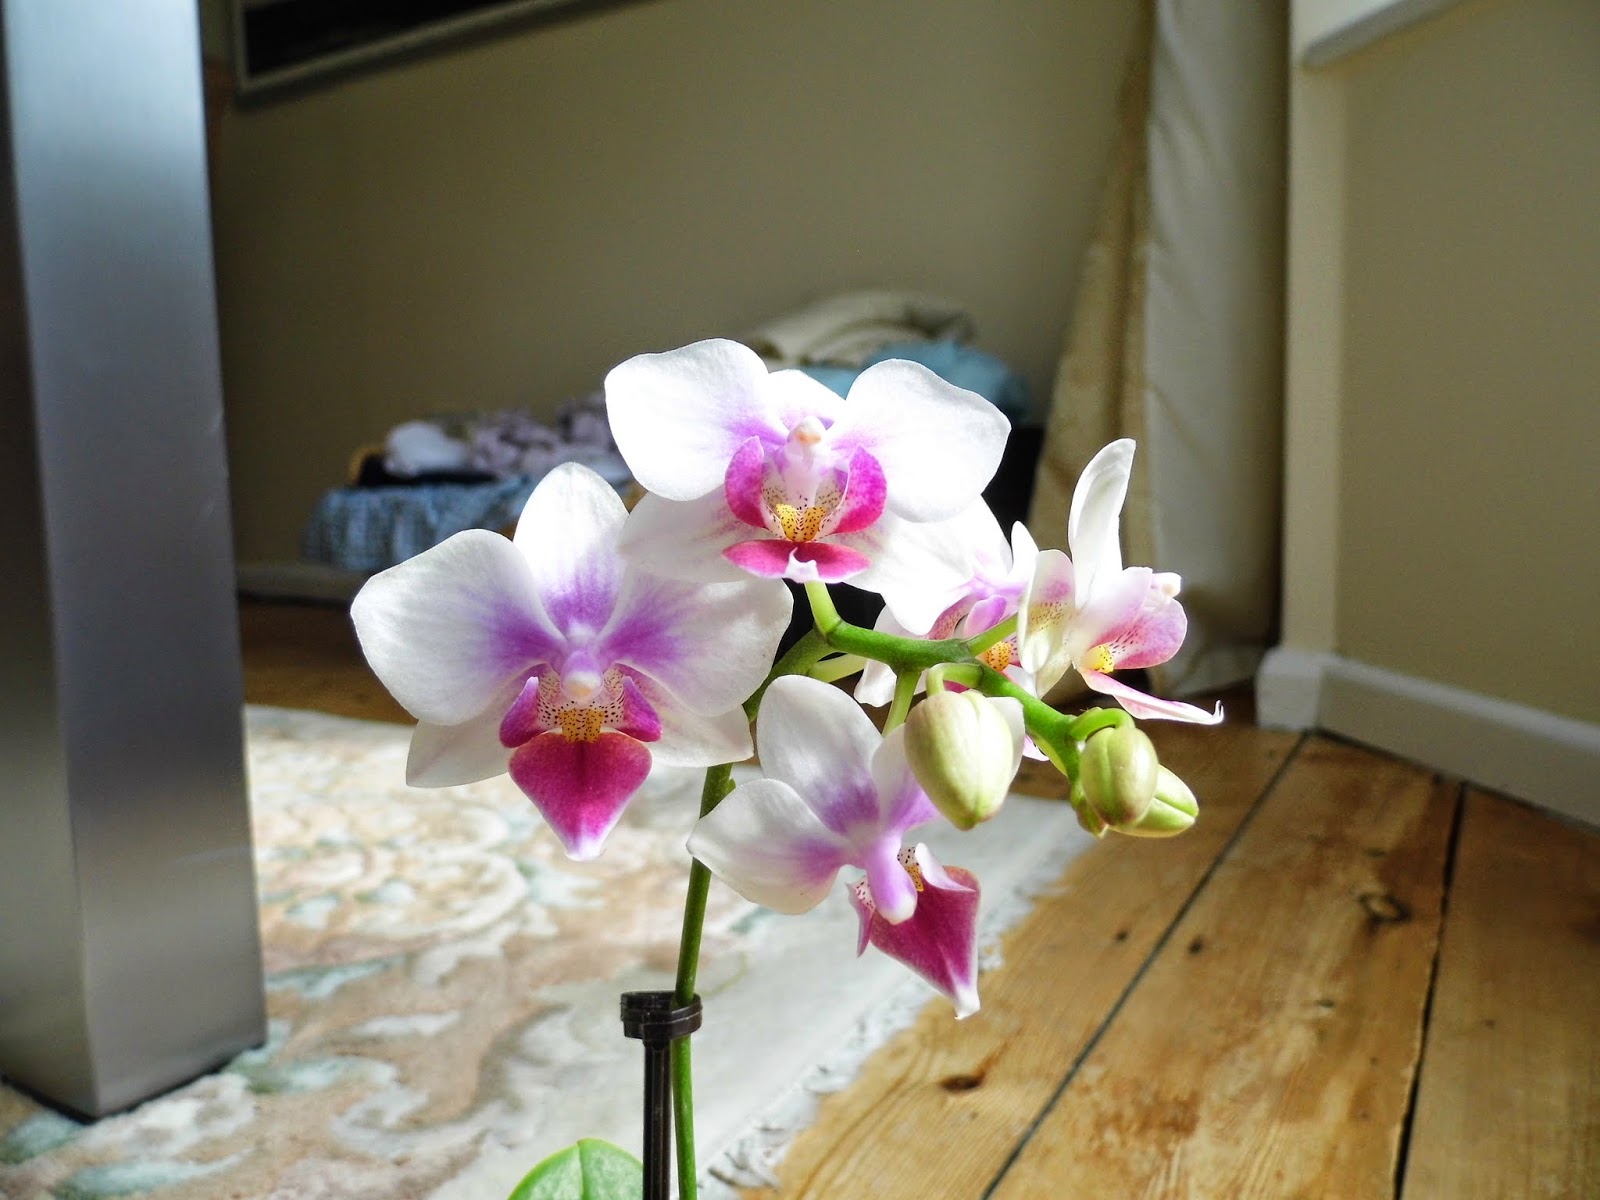
Now I'm not much of a flower person, but I have to admit, I do have a soft spot for orchids. They just have this exquisite elegant quality and just seem to be the most sophisticated plant in existence. So today, I spotted this beauty in IKEA and couldn't resist picking it up to take home and look after it.
Then in true Georgia O'Keeffe style I decided to draw/paint these wonderful flowers in close up. 
I did a few sketches with coloured pencils but wanted to try out a material that would give more impact so I opted for watercolour paints (my pallet is a bit of a mess...oops)

I wanted to get a faded effect and this is how I did it: 
Step1: I loaded my paintbrush with watercolour paint and made the initial outline.
Step 2: I then dipped my brush in water and dragged the brush outwards from the initial line.
Step 3: Finally I cleaned my brush of all paint and wet it, and dragged the pigment outwards until it nearly dissapeared.


And using the above technique here is the finished product. I feel that watercolour paint does justice to the delicate flowing quality of the orchid. Just shows how important the perfect material is.

Finally I'd like to apoligise for not posting very often recently-y'know exam season and all. However, summer is approaching which means tons more free time so I'm going to try and make one post a week. Thanks for having a nosy at my artwork.
Until next time...
Emma x

Monday, 21 April 2014

The Chapel in the Woods...

Oh how I hate artist's block! Let's admit it, it happens to all of us. Along with studying for my exams, it is the reason why I haven't posted in over a month (ouch!). But fear not my dear friends. I have a lot of very exciting things to show you!

All it took was an afternoon stroll in the beautiful Jesmond Dene to fill me with wonder and inspiration. Now for the eagle eyed among you, you'll realise that this post does not contain any of my own artwork (sorry about that) however, these pictures are jam packed with inspiration- something we all need more of from time to time.

Finally, I apoligise in advance for the quality of the pictures but as our walk was rather unexpected I wasn't carrying my camera. Instead, I went for te next best thing and used my mobile phone.
Let's get started...


Deep in the woods we uncovered this absolute gem! An old derelict chapel with gorgeous shrines tucked away in every nook and cranny; each one collections of perfect little statuettes and fascinating objects...


There is something very sacred and special about these pockets of remembrance on Easter weekend...


 You may also notice that I've put a film grain effect on these photos. I felt that they needed it in order to capture the incredible atmosphere of the chapel. It really is such a special place...


 So as I said this post contains none of my own artwork- actually I guess you could consider the photography artwork...anyway I just thought it would be nice to do a post solely based on inspiration. I just wanted to make a collection of interesting things to look at and get your creative cogs turning. Hope you enjoyed my photographs 
Until next time...
Emma x